
Setting up an OVH “kimsufi” server with encrypted filesystem running Debian 11.
In this post I’ll give an overview of my findings on how to install a Debian 11 on a “Kimsufi” OVH dedicated server.
One crucial thing I’ve found out is that the hardware you get isn’t very well described before you buy, especially the motherboard configuration and capability, so your mileage may vary.
What and why
After running my services on a “scaleway dedibox” for many many years, I’m starting to feed the need for something a little more powerful. The dedibox was a great deal, for 8.99€/month (before taxes), with a 1T drive, but the CPU was always on the slower side, and 4G of memory is starting to feed a little cramped.
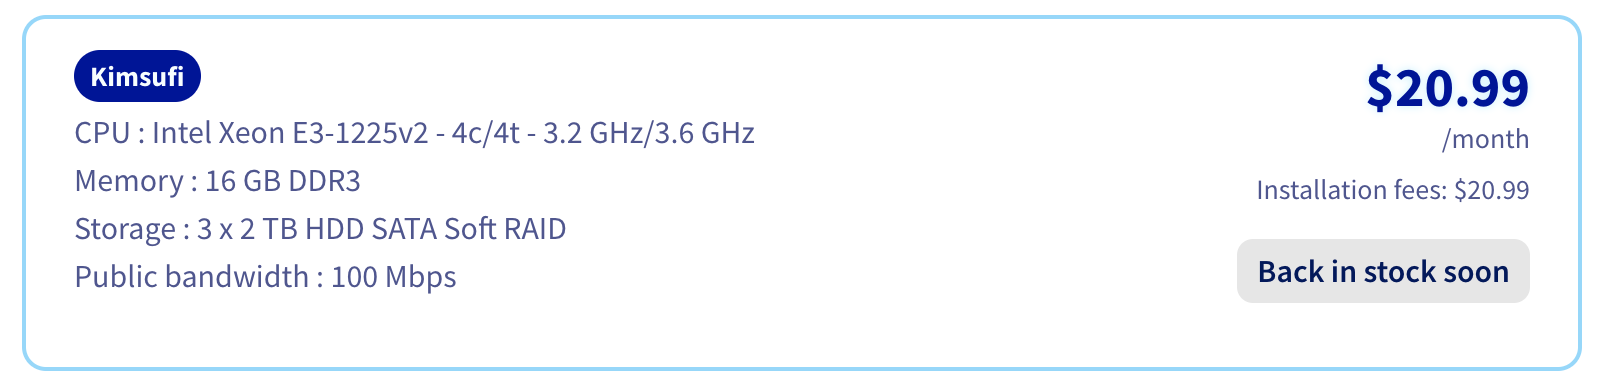
OVH’s offer is a little confusing, with a ton of options, in terms of CPU, Memory, and Disk, but I found a few ones around 20€, and this one caught my attention. I just waited for an availability with a hosting location in France and baught it.
Please note you may not be able to get the same price if you are a US or Canada resident (or at least if you can’t provide a French address).
At the time of purchase, the price in euros was 17.99€.
The competition:
- Scaleway dedibox still has interesting offers, and I did hesitate. I find it a little more expensive for what I want but it ha 1Gps bandwidth (OVH has 100Mbps) and a /48 for ipv6 (I found out that OVH gives you a /128 😱😱😱).
- Ikoula also seems to have very good offers. The one that I was interested in was sold out though. They offer 250Mbps network, which seems like an ok deal.
Why an encrypted root filesystem?
Obviously, this doesn’t protect me from hackers, it’s not really a security thing. And the /boot partition won’t be encrypted anyway (I know there are ways to do it, I’m not sure there are ways to do it without a password being typed physically on the keyboard, and I’m not that interested).
It’s more about what happens if a disk fails and gets thrown away, or about decommissioning the server — at that point I won’t have to worry about anything.
Guides
Well, it looks like some people have done exactly this already, so why don’t I just follow their guidance?
- This script on GitHub looks like it’s almost exactly what I’m trying to do. The only difference I could see is that they have 4 disks and I have 3. Pretty easy.
- This post also looks super similar, and even mentions the “kimsufi” brand - doesn’t have RAID 5 though, while I was thinking about RAID 5
Findings and bad surprises
Well, I tried a bunch of things. The “installation” part (deboostrap, the part that’s chrooted, etc.) goes well but when rebooting, the server never even reponsded to ping.
A few findings
- That specific server doesn’t support UEFI boot. I researched the motherboard (you can find the model by using
dmidecode), and it’s UEFI capable, it’s just not enabled; - That range of server doesn’t offer KVM. I couldn’t even find a paid option (I would have paid a few bucks to just see what’s going on on the screen, and/or be able to enable UEFI).
This makes me think that there is also a chance that there’s a fairly wide discrepancy from server to server in the same range - these may be recycled hardware from higher rangers, where customers used to have KVM, hence access to BIOS options.
After finding that UEFI wasn’t supported, I switched to grub-pc and tried again, to no avail.
I have two hypotheses about the server not booting on the initramfs.
- There’s something wrong about using GPT-partitioned disk. I’m not saying it’s not supported, it’s well possible I was doing something wrong, but I never got it to boot with a GPT partition;
- It could be that I didn’t set the
DEVICEin the initramfs config correctly, but I’m pretty sure I tested witheth0andeno1. What I ended up doing was to addnet.ifnames=0 biosdevname=0to the defaultgrubconfig file in/etc/default/grub.
LVM or no LVM?
Do I need LVM? On the one hand, it’s flexible, and it would allow to add a separate /var directory
On the other hand, my current server doesn’t have this issue, /var never got full - but did I just get lucky?
I’m deciding I will use LVM, just in case I want to separate /var or something similar later
Step by step setup
This is how I’ve decided I would use my disks. Sda will have a /boot partition, while sdb and sdc will have some swap.
I did a tiny little bit of research, apparently doing swap on RAID doesn’t provide any advantage over doing swap on 2 devices with the same priority.
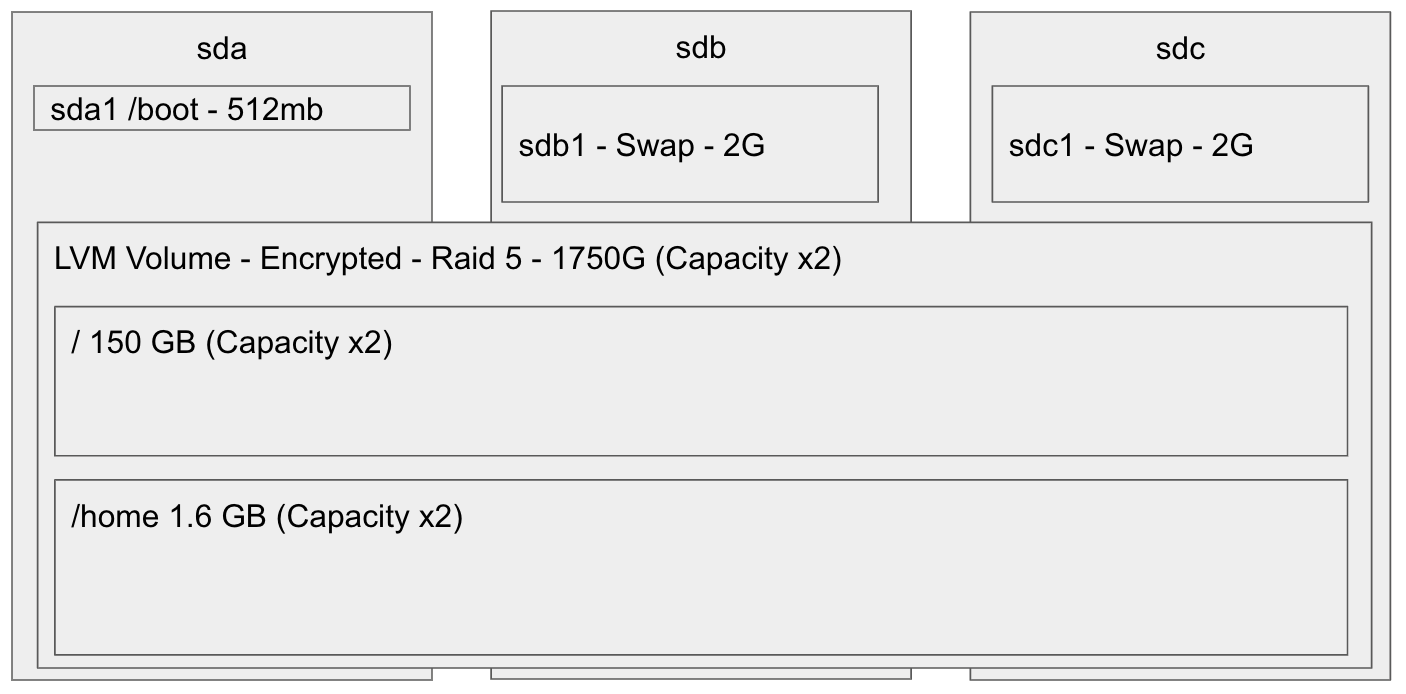
With all my trials and errors, I ended up messing it up a little bit, and I only have 2x512MB of swap …. let’s hope for the best with so little swap (but also so much memory).
So, for the disk setup, just partition as desired, I’ll assume you know how to do that.
/dev/sda1is boot/dev/sdb1and/dev/sdc1are swap/dev/sda2,/dev/sdb2, and/dev/sdc2are equal size partitions that we’ll use for RAID 5
From the OVH manager, boot on a rescue image (at the time of this post, “rescue-pro”), and log in (as root).
# Reload the partitions if needed
partprobe

# Create the RAID5 array that will host the LVM volume
mdadm --create /dev/md0 --metadata=1.2 --level=5 --raid-devices=3 /dev/sd[abc]2

# Setup encrypted root partition
# This will ask you the encryption key, twice
cryptsetup -c aes-xts-plain -y -s 512 -h sha512 luksFormat /dev/md0
# This will ask you the encryption key, once
cryptsetup luksOpen /dev/md0 cryptroot

# Create the LVM
pvcreate /dev/mapper/cryptroot
vgcreate vg0 /dev/mapper/cryptroot
lvcreate -L 300GB -n root vg0
lvcreate -l 100%FREE -n home vg0

# Format paritions, for now we can skip swap
mkfs.ext4 -L root /dev/vg0/root
mkfs.ext4 -L home /dev/vg0/home
mkfs.ext4 -L boot /dev/sda1

# mount root partition
mount /dev/vg0/root /mnt

# mount other partitions
mkdir /mnt/home
mount /dev/vg0/home /mnt/home

mkdir /mnt/boot
mount /dev/sda1 /mnt/boot

# Debootstrap - create a debian system in /mnt
# First import the key
wget https://ftp-master.debian.org/keys/release-11.asc -qO- | gpg --import --no-default-keyring --keyring ./debian-release-11.gpg
# And launch debootstrap
debootstrap --keyring=./debian-release-11.gpg --arch=amd64 stable /mnt http://ftp.fr.debian.org/debian

# At this point the base system is installed installed and you are ready to chroot
# With just a few tweaks needed.

# Set up resolv.conf / hostname
echo "nameserver 8.8.8.8" > /mnt/etc/resolv.conf
echo "MY_SERVER_NAME" > /mnt/etc/hostname

# crypttab
cat > /mnt/etc/crypttab << EOF
cryptroot UUID=$(blkid -s UUID -o value /dev/md0) none luks
swap-sdb      /dev/sdb1    /dev/urandom   swap,cipher=aes-cbc-essiv:sha256,size=256
swap-sdc      /dev/sdc1    /dev/urandom   swap,cipher=aes-cbc-essiv:sha256,size=256
EOF

# fstab
cat > /mnt/etc/fstab << EOF
proc                        /proc   proc    defaults    0 0
UUID=$(blkid -s UUID -o value /dev/mapper/vg0-root) /       ext4    defaults    0 1
UUID=$(blkid -s UUID -o value /dev/sda1)                    /boot   vfat    defaults    0 0
UUID=$(blkid -s UUID -o value /dev/mapper/vg0-home) /home       ext4    defaults    0 1
/dev/mapper/swap-sdb none    swap defaults,pri=1000	0 0
/dev/mapper/swap-sdc none    swap defaults,pri=1000	0 0
EOF

# mount devices to new ubuntu installation
mount -o bind /dev /mnt/dev
mount -o bind /dev/pts /mnt/dev/pts
mount -t sysfs /sys /mnt/sys
mount -t proc /proc /mnt/proc

# And now you're ready to chroot
chroot /mnt
At this stage you have a sort-of working debian base in /mnt (now /).
What’s left is mostly the initramfs, the dropbear install for that, and installing grub.
# Set up root login via SSH
mkdir ~/.ssh
chmod 700 ~/.ssh
touch ~/.ssh/authorized_keys && chmod 600 ~/.ssh/authorized_keys
cat > ~/.ssh/authorized_keys << EOF
PUT_YOUR_SSH_PUBLIC_KEY_HERE
EOF

# Set root password
passwd

# Fix raid device files - I'm not sure that's needed, but copied it over
mkdir /dev/md
ln -s /dev/md0 /dev/md/0

# mtab
cp /proc/mounts /etc/mtab

# Install locales
apt-get install locales
dpkg-reconfigure locales

# Install packages / kernel
apt-get upgrade -y
DEBIAN_FRONTEND=noninteractive apt-get install -y \
 vim \
 linux-base \
 linux-image-amd64 \
 linux-headers-amd64 \
 grub2 \
 mdadm \
 cryptsetup \
 cryptsetup-initramfs \
 lvm2 \
 initramfs-tools \
 openssh-server \
 dropbear-initramfs \
 dosfstools

# Optional: change dropbear options. This forces the only command
# possible to be cryptroot-unlock. I personally don't know whether that's
# really useful.
echo 'DROPBEAR_OPTIONS="-RFEsjk -c /bin/cryptroot-unlock"' > /etc/dropbear-initramfs/config

# Add your local SSH public keys to dropbear's authorized_keys file to allow password-less logins
cp ~/.ssh/authorized_keys /etc/dropbear-initramfs/authorized_keys
chmod 640 /etc/dropbear-initramfs/authorized_keys

# Set initramfs parameters
sed -i "s/DEVICE=/DEVICE=eth0/" /etc/initramfs-tools/initramfs.conf

# Grub device names
sed -i "s/GRUB_CMDLINE_LINUX=.*\"GRUB_CMDLINE_LINUX=\"net.ifnames=0 biosdevname=0\"" /etc/default/grub

# Network interfaces
cat > /etc/network/interfaces << EOF
# This file describes the network interfaces available on your system
# and how to activate them. For more information, see interfaces(5).

source /etc/network/interfaces.d/*

# The loopback network interface
auto lo
iface lo inet loopback

# The primary network interface
# allow-hotplug eth0
auto eth0

iface eth0 inet static
    pre-up ip addr flush dev eth0
    address [YOUR IP ADDRESS]
    netmask 255.255.255.0
    network [YOUR NETWORK]
    broadcast [YOUR BROADCAST]
    gateway [YOUR GATEWAY]
EOF

# The following steps may give you a warning about the vg0 headers, you can
# ignore them for now

# Update the initramfs
update-initramfs -u -k all

# Install grub
grub-install /dev/sda
grub-mkconfig -o /boot/grub/grub.cfg
At this stage, you are ready to reboot.
Remember to deactivate the rescue netboot in your OVH console.
# Exit chroot
exit

# Unmount things
umount /mnt/{sys,proc,dev/pts,dev,home,boot}
umount /mnt

# Nicely close things
vgchange -a n
cryptsetup luksClose cryptroot

# Reboot
reboot
First boot
WARNING: PV /dev/mapper/cryptroot in VG vg0 is using an old PV header, modify the VG to update.
# Update the old LVM header
vgck --updatemetadata vg0
You’re all set, and you can start really setting up your server.
Discussion
RAID1 vs. RAID5
When using the OVH web-based installer, you have to set the root partition to be RAID1 (or no RAID), but it cannot be RAID5. I don’t know where this restriction is coming from, and as far as I can tell, having RAID 5 for the root partition works just fine.
RAID5 and –assume-clean
After you issue the mdadm command to create the RAID array, you may notice a very high load on the server for a few hours. It’s spending cycles re-recreating the parity disk. One of the original articles was using the --asume-clean flag, which prevents that. From what I’ve gathers, it’s not a great idea, and since this will happen only once, I don’t think it’s a big deal - it just makes the debootstrap very slow, hence frustrating.
Network setup through legacy mode
I have chosen to use /etc/network/interfaces, instead of the systemd new method, as well as to use the old interface names. I know these will end up being deprecated at some point, but this is what I know, and considering I don’t have a KVM for this server, I would rather minimize the number of potential issues.